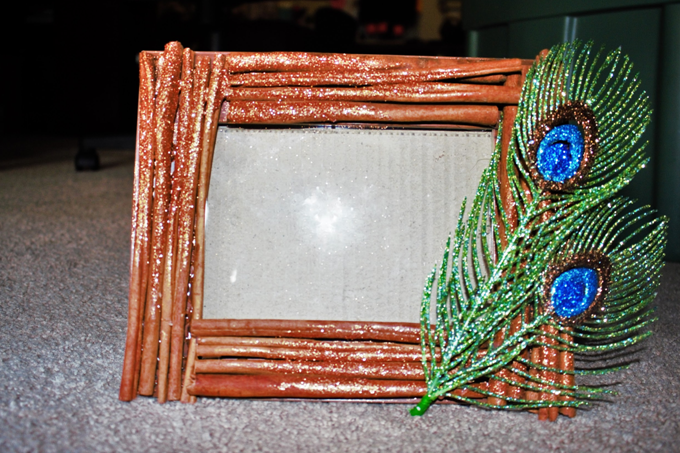
DIY PICTURE FRAME
How to make your own picture frame
Hi there!
Today I decided to embark on a fun new journey and start writing DIY articles for this newspaper! Needless to say, I’ll be here twice a month bringing you the craftiest DIY’s that you can make from stuff you find at home or for very low cost. Let’s get started!
This week’s craft is a cute, quick and easy one. You can find all of the items from around your house to make a cute rustic or fall themed picture frame.
Supplies:
Old picture frame
Small sticks, twigs, or cinnamon sticks, etc.
Hot glue gun
Elmer’s or craft glue
Glitter (opt.)
Some sort of decoration (opt.)
Scissors
Paint brush
Time it takes: About 30 minutes
Does it make a mess?: YES.
Step 1:
Start by removing any thing on the frame like stickers and remove any photos from inside it. Then take a piece of paper and fold it to fit over the glass, to protect it from the glue. Then cover your work space with newspaper or packing paper to protect its surface.
Take your sticks and measure them to the sides of the frame for the length you need. If they need to be trimmed, do that now. Once they are the appropriate length, arrange them on the frame to where they fit properly and the frame underneath does not show.
Step 3:
Once you have everything where you want it, start hot gluing everything into place. (TIP: Make sure to not get glue near or on the glass!) Once it’s glued allow 5-10 minutes to dry.
Step 4:
If you want to add a bit more “pizazz” to your frame then get out your Elmer’s glue and glitter! Use your paintbrush to apply the glue wherever you feel the frame needs to sparkle, then quickly sprinkle on the glitter.
Step 5:
Once the glitter has dried you can take your decoration and apply it with hot glue wherever you please on the frame.
Viola! You successfully made a cute DIY photo frame. Good job! Now just add the picture in it you’d like and you’re all set. Check out my frame above!


