5 WAYS TO LIGHT UP YOUR ROOM
Looking for a creative way to add contrast to a dark room at night? Well, these 5 crafts have got you covered!
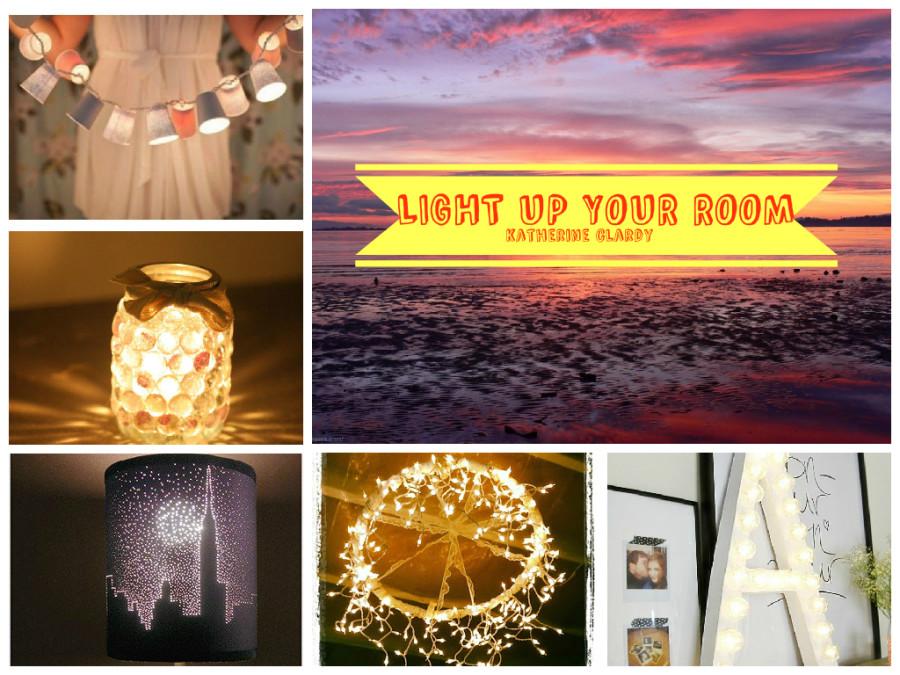
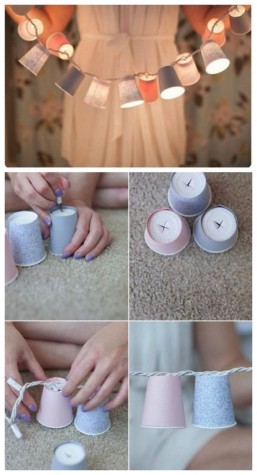
DIY STRING LIGHTS
Rather than having boring string lights draped across the ceiling, use cups!
WHAT YOU’LL NEED-
- Paper cups (colored is optional)
- String lights
- Scissors
STEPS:
- Cut X-Shaped slits in the top of each cup with the scissors
- Put the bugs of the string lights inside of each cup (and…thats it!)
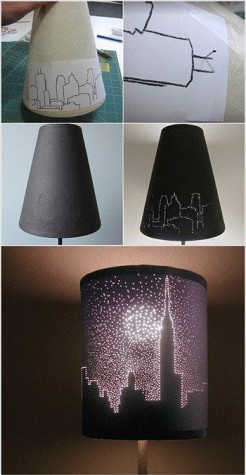
DIY PHOTO LAMP
This is such a beautiful creation, you can use any photo/design!
WHAT YOU’LL NEED-
- Black lampshade
- Lamp (with bulb)
- Thumbtack/needle
- Photo/design
- Thin white sharpie
STEPS:
- Trace the photo/design onto your lampshade with the thin white sharpie
- Use the thumbtack/needle to poke holes in the shade along the sharpie’s line (add excess detail if liked)
- Plug it in!
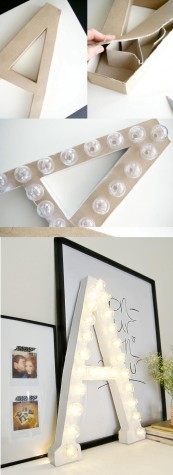
DIY MARQUEE LETTERS
This is a bright way to add a personal touch to your space!
WHAT YOU’LL NEED-
- Wooden Letter
- Paint
- Knife
- Light Bulbs
STEPS:
- Paint your letter
- Use the knife (or a wood cutter) to cut X-shaped slits along the backside of the letter
- Place bulbs into each slit
- Light em up!
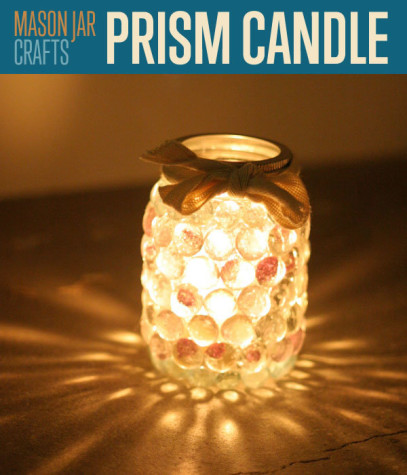
DIY PRISM LIGHT
This adds a really sweet effect to the walls at night!
WHAT YOU’LL NEED-
- Mason Jar
- Round glass decor
- Glass glue
- Ribbon/twine
- Electric Candle
- Brushes
STEPS:
- Apply glue all over mason jar with your brushes and add your glass decor
- Tie a bow with the ribbon/twine (optional. for “adorablism”)
- Place the electric candle inside and viola!
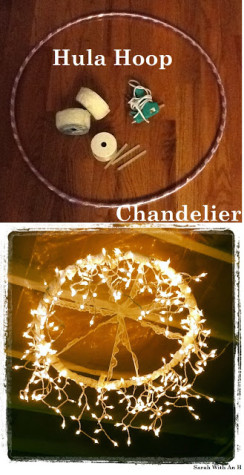
DIY FAIRY LIGHT CHANDELIER
This is super cool at night time!!!
WHAT YOU’LL NEED-
- Hula hoop
- Fairy lights
- Hot glue gun
STEPS:
- Wrap fairy lights around hula hoop so the y hang down
- Glue the ends of the fairy lights so they stay on (you can also use tape around the wrapped parts)
- Light them up!







Molly Pinkstaff • May 19, 2015 at 2:32 pm
Love the chandelier!!!!!!!!!